Weatherstripping replacement is one of the simplest yet most impactful ways to boost your home’s energy efficiency, reduce utility costs, and maintain indoor comfort throughout the year. As doors age or shift due to seasonal changes, the seals around them can wear down, leading to drafts, moisture intrusion, and even pest problems. Whether you live in a hot, humid climate or endure harsh winter temperatures, replacing old or damaged weatherstripping is a crucial part of home maintenance that often gets overlooked. In this guide, brought to you in partnership with CS Doors—a trusted provider of high-quality door solutions—we’ll walk you through how to approach weatherstripping replacement for different types of doors, including exterior entry doors, interior garage doors, sliding patio doors, french doors, and storm doors. For each door type, you’ll learn about the best sealing materials, common problem areas, and step-by-step tips to get the job done right.
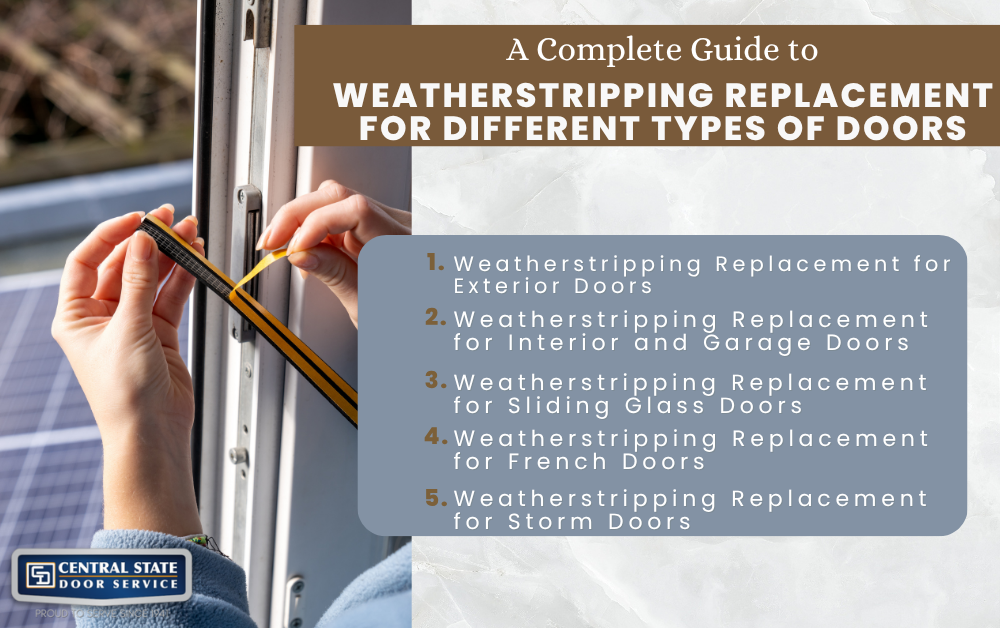
Weatherstripping Replacement for Exterior Doors
Best Weatherstripping Options for Exterior Doors
Exterior doors serve as the main barrier between your home and the outside world, so they require sturdy and reliable weatherstripping. Compression weatherstripping, made of foam or rubber, is a common and highly effective choice for sealing the sides and top of the door. V-strips or tension seals are also popular because they flex to create a tight seal and are ideal for door jambs. At the bottom of the door, a door sweep helps block drafts, dirt, and even small insects from entering. These weatherstripping solutions help reduce energy loss and make your home more comfortable year-round.
How to Replace Weatherstripping on Entry Doors
To start the weatherstripping replacement process on an entry door, first remove any old or worn-out materials. Loosen the material using a flat instrument such as a putty knife, along the surface to gently pry off the existing strip and thoroughly clean the door frame. Once the surface is free of debris and adhesive residue, measure each section of the door frame where new weatherstripping will be applied. Cut the latest materials to the correct size and attach them according to the type—whether adhesive, nail-on, or slide-in. Properly aligned weatherstripping ensures a tight seal without obstructing the door’s movement.
Recommended Materials for Exterior Door Sealing
For exterior doors, durability is essential due to frequent use and exposure to the elements. Rubber and silicone weatherstripping offer excellent longevity and resistance to temperature fluctuations, making them ideal choices. While foam tape may seem convenient, it tends to wear down quickly under heavy use and isn’t suitable for primary entryways. For long-term performance, consider metal-backed rubber strips that provide both strength and flexibility. Choosing high-quality materials during your weatherstripping replacement will help maintain a strong, weatherproof barrier.
Weatherstripping Replacement for Interior and Garage Doors
When to Replace Weatherstripping on Interior Doors
Not all interior doors need weatherstripping, but doors leading to garages or unheated spaces often do. If you notice drafts, musty smells, or temperature differences between rooms, it may be time to inspect the sealing. The door connecting your garage to your home should be treated like an exterior door due to safety and insulation concerns. In colder months, poorly sealed garage doors can let in freezing air, impacting indoor comfort and utility bills. A timely weatherstripping replacement can prevent these issues and enhance overall energy efficiency.
Types of Weatherstripping That Work Indoors
For interior use, adhesive-backed foam tape is one of the easiest options to install and is sufficient for light sealing needs. V-strips, made from plastic or metal, work well on the top and sides of doors, providing a spring-like tension that adjusts to movement. A door sweep or a threshold seal placed along the bottom of the door can block drafts and reduce noise transmission. These products are typically inexpensive and easy to find at hardware stores. They’re also well-suited to DIY installation, making them perfect for weekend home improvement projects.
DIY Tips for Indoor Weatherstripping Replacement
When replacing weatherstripping indoors, focus on areas where air transfer affects comfort or HVAC performance. Before applying any new materials, clean the door frame with mild soap or rubbing alcohol to ensure strong adhesion. Measure carefully and cut materials to fit, taking care not to block the door’s function. For garage entry doors, choose high-quality materials similar to those used on exterior doors for enhanced insulation and safety. Weatherstripping replacement for interior doors is a simple yet effective way to reduce noise, manage temperature, and boost home efficiency.
Weatherstripping Replacement for Sliding Glass Doors
Common Weatherstripping Issues with Sliding Doors
Known for their modern look and space-saving design, sliding glass doors still often suffer from unique sealing challenges. Because of their frequent movement and exposure to the elements, the weatherstripping around them wears out faster than other types of doors. If not cleaned regularly, the tracks can become clogged with dirt, causing the seals to degrade or detach. In colder climates, failing seals can lead to condensation and moisture damage near the door. Addressing these issues through weatherstripping replacement can significantly improve insulation and protect your floors and walls.
Ideal Weatherstripping Types for Sliding Doors
The most effective type of weatherstripping for sliding glass doors is a brush-style seal, which fits into the track and allows for smooth sliding while blocking drafts. Vinyl and rubber strips are also used along the fixed panels to create a firm seal without interfering with the door function. When choosing materials, it’s best to use products designed specifically for patio or sliding doors, as they account for motion and clearance. These specialized seals are available in kits and are often compatible with major door brands. With the right product, your sliding glass door can be both functional and energy-efficient.
How to Replace Weatherstripping on Sliding Glass Doors
Begin your sliding door weatherstripping replacement by cleaning. Remove all traces of dirt from the tracks with a detailed cleaning and residue. If necessary, remove the sliding panel to access the existing weatherstripping. Carefully pull out the old brush or seal, making note of how it was installed. Insert the new weatherstripping into the same track or apply it using adhesive, depending on the design. Once complete, reassemble the door and test the slide—if it glides smoothly and you feel no air leaks, your replacement was successful.
Weatherstripping Replacement for French Doors
Where French Doors Lose Energy
French doors, particularly double-hinged ones, are beautiful but often inefficient when it comes to insulation. One of the most significant problem areas is the seam where the two doors meet—air can easily pass through if not correctly sealed. Gaps may also form along the edges of the inactive door, especially if it’s not latched securely. Over time, bottom sweeps can wear out or detach, allowing drafts and moisture to enter. Weatherstripping replacement in these areas can make a noticeable difference in home comfort.
Types of Weatherstripping That Work for French Doors
To seal between the two door leaves, an astragal—a vertical strip that overlaps the seam—is commonly used. This component often contains its own seal or is combined with compression weatherstripping to close gaps. For the edges and top, foam or rubber compression seals are ideal because they adjust to slight misalignments in the door. Door sweeps on the bottom of each door panel help prevent air and dust intrusion. These solutions work together to create a tight, insulated seal across the entire door system.
Step-by-Step French Door Weatherstripping Replacement
Start your French door weatherstripping replacement by inspecting all the edges and the center seam for visible gaps or damaged seals. If there’s no astragal present, consider installing one to bridge the middle seam between the two doors. For the sides and top, measure and apply compression or adhesive-backed weatherstripping after cleaning the surface. Replace or add bottom sweeps to both door panels to improve protection from drafts and water. With a complete seal in place, your French doors will be both elegant and energy-efficient.
Weatherstripping Replacement for Storm Doors
Why Storm Doors Need Good Seals
Storm doors serve as a secondary barrier, protecting your main door from wind, rain, and extreme temperatures. When weatherstripping fails, these benefits are lost, and your entryway becomes vulnerable to drafts and water damage. A well-sealed storm door can reduce the strain on your HVAC system by helping to maintain indoor temperatures. Additionally, a tight seal adds a layer of noise reduction and security. Weatherstripping replacement is essential for keeping storm doors functional and protective throughout the seasons.
Best Weatherstripping Materials for Storm Doors
Foam gasket strips are commonly used around the frame of storm doors, creating a firm seal without adding bulk. At the bottom, brush-style or rubber sweeps help seal the gap between the door and the threshold. In some cases, magnetic seals are used to create a self-closing effect that improves insulation. These materials are designed to be durable but may still need periodic replacement due to wear and tear. Choosing high-quality weatherstripping materials will extend the life of your storm door and maintain its performance.
Tips for Replacing Weatherstripping on Storm Doors
To replace weatherstripping on a storm door, begin by removing the door from its hinges if necessary, then peel off the old gasket or sweep. Clean the frame thoroughly to ensure good adhesion for the new seal. Measure each section carefully and cut the new material to size, securing it with the appropriate fasteners or adhesive. Pay close attention to the bottom sweep, as this area takes the most abuse from foot traffic and weather. Regular weatherstripping replacement will ensure your storm door continues to do its job effectively.
Final Thoughts on Weatherstripping Replacement
Weatherstripping replacement is one of the most cost-effective and DIY-friendly upgrades you can make to your home. It improves insulation, reduces energy bills, and enhances comfort by sealing out drafts and noise. Whether you’re updating the seals on an exterior door, a sliding patio door, or even a storm door, the process is straightforward, and the benefits are long-lasting. Regular inspection and timely replacement ensure your doors continue to perform at their best, no matter the season. For expert advice, durable materials, or professional installation, consider reaching out to CD Doors, your reliable partner in high-quality door solutions. Contact CS Doors today! Don’t wait for drafts to become discomfort—take the first step today and make weatherstripping replacement a priority in your home maintenance plan.